Creating Simple Formulas in Excel 2013. One of the main reasons why businesses use Excel for their bookkeeping is the fact that it has the ability to make numerical calculations based on custom-made formulas. You can use the cell references to create mathematical formulas so that Excel 2013 will make updated calculations every time you enter in new data. Creating simple formulas in Excel 2013 will help you ensure that your data is always up to date. This guide will walk you through creating simple formulas in Excel 2013.
Step 1: Open a Blank Workbook in Excel 2013
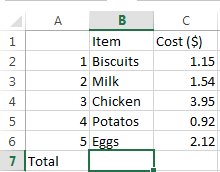
Step 2: Enter in your data
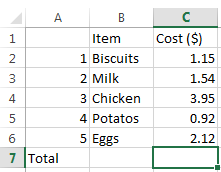
Step 3: Click on the cell in which you want your final calculation to be visible
Step 4: Enter in the necessary formula. Below is a table of formulas for different functions
|
Addition |
+ |
|
Subtraction |
– |
|
Multiplication |
* |
|
Division |
/ |
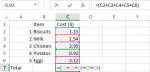
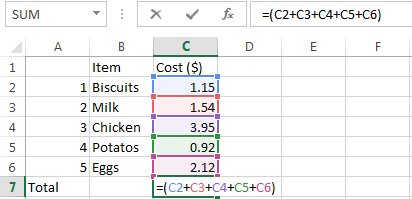
All formulas must begin with an equal sign (=) followed by the cell addresses that you wish to involve in your calculation. In this example, the cell addresses are highlighted in different colors below.
In this case, in Cell C7, you would write the following formula as shown below:
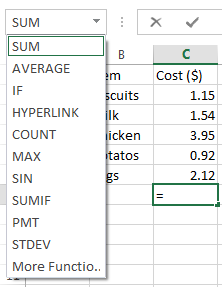
Step 5: If you have difficulty remembering difficult formulas, you can just enter an equal to sign in the target cell and choose from a number of options.
Step 6: Once you have entered in the formula, click enter and Excel 2013 will process your formula to make the requested calculations.
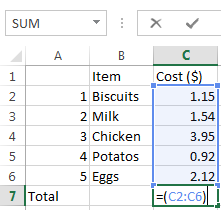
Step 7: If a large number of consecutive cells are involved in a calculation, you can simplify the formula as shown below:
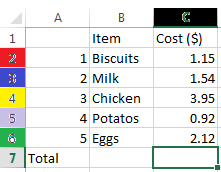
Step 8: If you want to calculate the sum of a large number of consecutive numbers, you can use the AutoSum feature. Highlight all the numbers you want to include in the addition, starting from the target destination and click on the AutoSum feature, as shown below.
