
How to Add a Watermark in Word 2013
Watermarks are the most effective way to protect your work from misuse. A watermark is a translucent background image that appears behind text in a document. If you want to make sure you get credit for a masterpiece document you have created, it is imperative that you learn how to add a watermark in Word 2013. In this guide, we will show you the ins and outs of how to add a watermark in Word 2013 so that you can keep your creations safe and receive credit where it is due.
Step 1: Launch Word 2013
Step 2: Open a document in which you want to add a watermark
Step 3: Click on the Design tab
![]()
Step 4: Press the Watermarks button in the Page Background tab
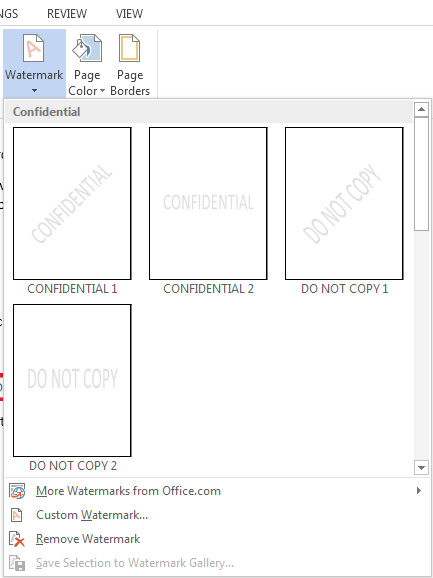
Step 5: Choose whichever design you want to use for your watermark
Step 6: If you want to add a custom image for your watermark, you can click on Custom Watermark… in the Watermark drop-down menu. Select Picture Watermark, add the image you wish to use and click OK. You can also add a custom text watermark here by selecting Text Watermark and entering in the details.
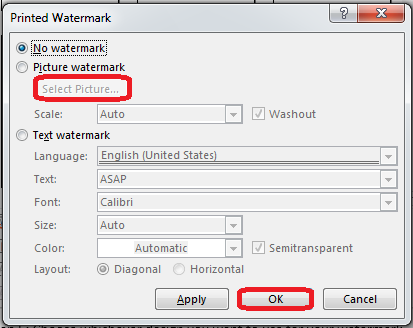
Step 7: You can change the layout, size, font, text and transparency of a watermark in case of a custom text watermark