Protecting Worksheets in Excel 2013
![]()
Sometimes you may require to protect your important worksheets from misuse & theft. in this post, you are going to learn how to protect your Worksheet in Excel 2013 from unauthorized access.
There are variety of ways in Excel 2013 to protect an Excel sheet. These are the available options:
1. Mark as Final: use “Mark as Final” to protect your worksheets in Excel 2013. This option will allow no further editing.
2. Encrypt with Password: use “Encrypt with Password” to protect your worksheets in Excel 2013. This option will encrypt your Worksheet with a Password.
3. Protect current sheet: use “Protect Current Sheet” to protect your worksheets in Excel 2013. This controls specify the type of authentication that you want to provide to the other user.
4. Protect Workbook structure: use “Protect Workbook structure” to protect your worksheets in Excel 2013. This will protect modifying of Workbook Structure.
5. Restrict Access: use “restrict access” to protect your worksheets in Excel 2013. This option will protect your files from unauthorised access, editing & printing.
6. Digital singnature: use “Digital Signatures” to protect your worksheets in Excel 2013. This option adds an invisible digital signature.
Follow these steps to protect your workbooks in Excel 2013:
Step 1: Open the Excel workbook you would like to encrypt or protect
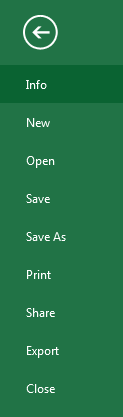
Step 2: Now, SimplyGo to the File menu and select the Info option from the left-side panel.
Step 3: now simply select the “Protect workbook” option from the right side in the option Box.

Step 4: Now Simply choose from available options the best suited option for you!

Use Protect options to save your files. it will save your precious data & time.