How to Use Mail Merge in Word 2013
Mail Merge is an extremely useful feature that Word 2013 has to offer. If you have ever come across a situation in which you have to send slightly different versions of the same Word document to different people, thanks to Mail Merge, you no longer need to waste your precious time doing so manually. If you learn how to use Mail Merge, you can send different versions of the same document to different people with unprecedented ease. This step-by-step guide will walk you through the ins and outs of how to use Mail Merge in Word 2013
Step 1: Launch Word 2013
Step 2: Click on the Mailings tab
![]()
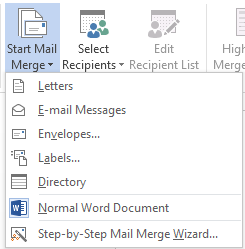
Step 3: Click on Start Mail Merge in the Start Mail Merge section

Step 4: In the dropdown menu, select the Document type you wish to use. For instance, if you want to send a letter to multiple recipients, select Letters from the list
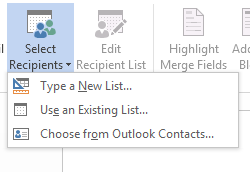
Step 5: Click on Select Recipients in the Start Mail Merge tab and select Type a New List…
Step 6: In the New Address List window, you can enter details of all people you wish to send the letter to. Make sure you indicate which boxes you wish to include by checking the boxes. Click OK once you are done and save the address list.

Step 7: Click on Select Recipients in the Start Mail Merge tab and select Use Existing List…Find your saved list

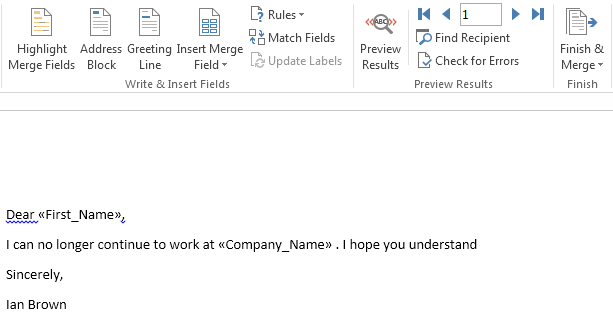
Step 8: Go in the document where you wish to insert the First Name of the recipients and select Insert Merge Field in the Write & Insert Fields section. Select First Name

Step 9: Once you are done inserting all the fields, simply click Finish & Merge in the Finish section