Customizing Ribbon and Quick Access Toolbar in Word 2013. Microsoft has discarded the concept of Toolbar and Menus in MS Office programs and introduced Ribbon and Quick Access Toolbar since Office 2007. Majority of the users don’t know the Ribbon and Quick Access Toolbar can be customized for their advantage. Let see detailed steps of customizing a Ribbon and Quick Access Toolbar in Word 2013.
Steps to Customize Ribbon:
1. Launch Word 2013
2. Open any Word document
3. Click on File to reveal the Backstage View
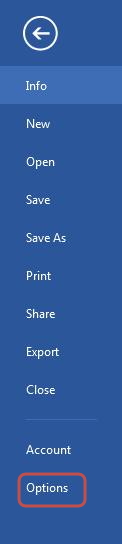
4. Click on Option
A Word Options dialog box pops up
5. Click on Customize Ribbon
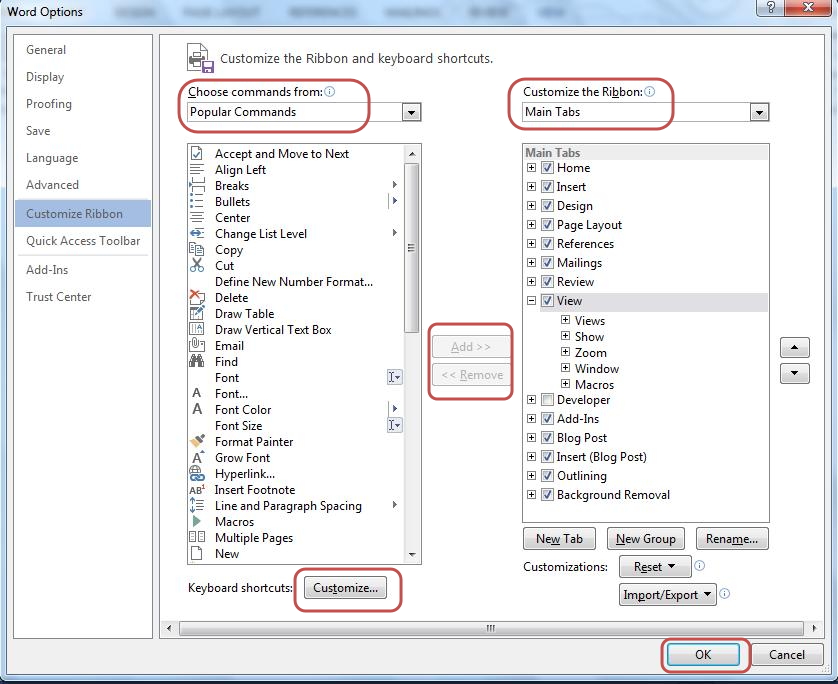
You can see two columns lists such as
- Choose Commands From: Available commands that can be added to Ribbon. Word 2013 offers different types of commands
- Customize the Ribbon: It lists default menu options present in Ribbon. Any command added in Ribbon appears under this column. Word 2013 offers different customization options for the Ribbon
Steps to add command to Ribbon:
6. Click on desired command from the list
The Add button between columns gets activated. (Note: The Add button is grayed until you select command to add or remove)
7. Click on Add
You can see the new command added to the Ribbon
Steps to remove command from Ribbon:
6. Click on the command you want to remove under the Customize the Ribbon list
7. Click on Remove
You can also create customized keyboard shortcuts for any command in the Ribbon
Steps to add customized keyboard shortcut for command in Ribbon:
6. Select desired command in the Ribbon for which you want a customized keyboard shortcut
A Customize keyboard window opens
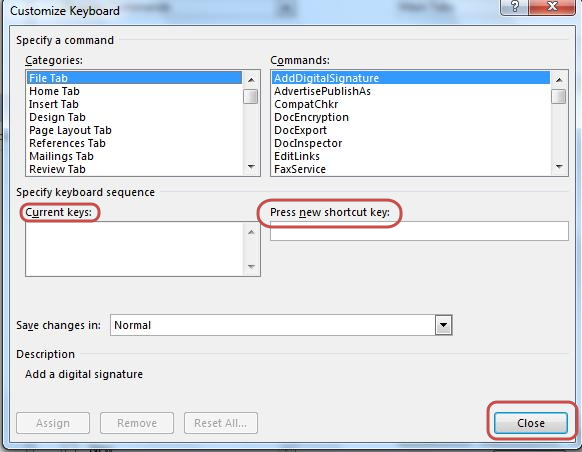
7. Click in text box with title Press New Shortcut key
8. Press any desired key combination
Note: If you press any existing keyboard shortcut, you will see a message displayed in currently assigned to. This means you have to select a new keyboard shortcut combination.
9. Click on Assign
You can see your new shortcut key combination in the Current Keys text box
10. Click on Close
Steps to customize Quick Access Toolbar:
![]()
Note: Go to Word Options dialog box by following the steps 1-4 given above.
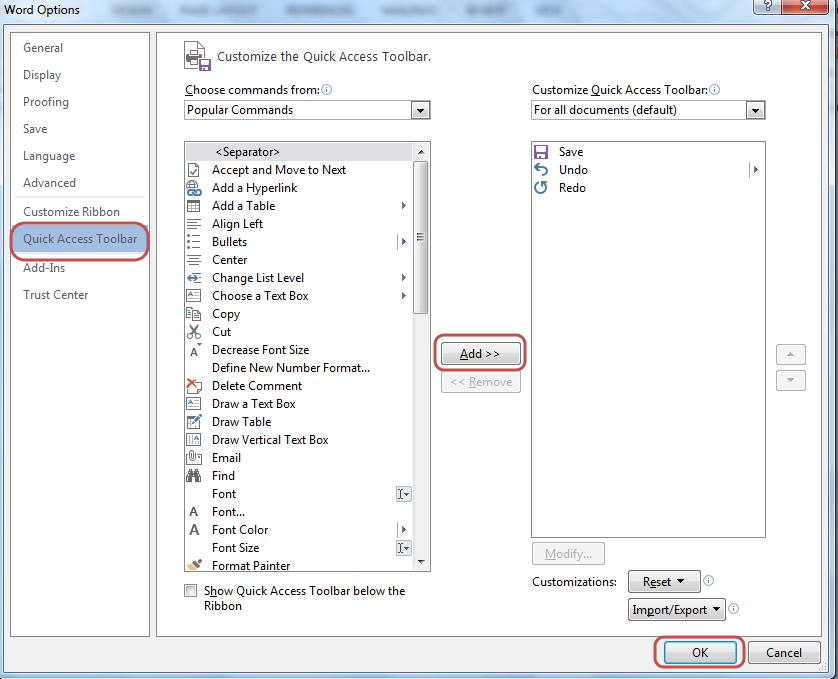
5. Click on Quick Access Toolbar
The quick Access Toolbar window is similar to customize the RibbonWindow. It has two columns Choose Commands from and Customize Quick Access Toolbar.
Steps to add command to Quick Access Toolbar
6. Click on desired command from the list
The Add button between columns gets activated. (Note: The Add button is grayed until you select command to add or remove)
7. Click on Add
You can see the new command added to the Quick Access Toolbar
8. Click on OK after you have finished customization of Ribbon and Quick Access Toolbar