How to Add and Remove Section Breaks in Word 2013
If you are working with a painfully long document and have yet to insert section breaks into it, you are probably doing something wrong. Section breaks enable users to divide a document into separate sections. Although this might not seem to different from using page breaks, section breaks are in practice quite different. They put you in a position to take advantage of a number of incredible features, including easily distinguishing between two sets of formatting within the same document, or printing different sections of the same document differently with unprecedented ease. In this tutorial, we will teach you how to add and remove section breaks in Word 2013.
Step 1: Launch Word 2013
Step 2: Open a document in which you wish to add section breaks
Step 3: Position the cursor where you wish to add the first section break

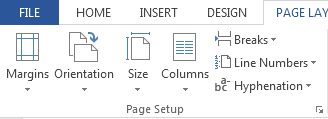
Step 4: Click on the Page Layout tab
![]()
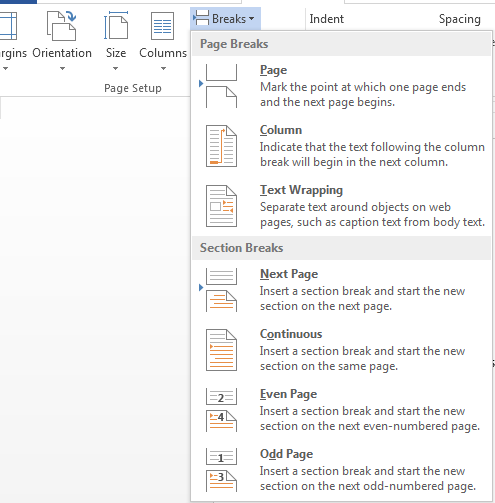
Step 5: Click on Breaks in the Page Setup section

Step 6: Select the kind of section break you wish to insert into your document. There are four main kinds of section breaks. Next Page starts a new section on the next page; Continuous starts a page break on the current position; Even Page starts a new section on the next even-numbered page; and Odd Page starts a new section on the next odd-numbered page.

Step 7: If you want to remove a particular section, select it and press Delete on your keyboard
Step 8: To remove all section breaks in your word document, click on Replace in the Home tab
Step 9: In the Find and Replace window, click on the Special and select Section Break. Click on Replace All

